Short summary:
In this article, I will explain how to divide the image into 4 parts using OpenCV. Code for this article is available here.
So Let’s start :)
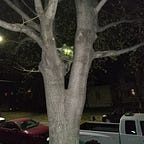
For example, I want to divide my photo into 4 parts:

For a better understanding in this photo, I added labels such as “1,2,3,4”.
1 create the file with the name how_devide_image_without_save.py and paste the next code:
import cv2# load image
img = cv2.imread('image_test.jpg')##########################################
# At first vertical devide image         #
##########################################
# start vertical devide image
height = img.shape[0]
width = img.shape[1]
# Cut the image in half
width_cutoff = width // 2
left1 = img[:, :width_cutoff]
right1 = img[:, width_cutoff:]
# finish vertical devide image
This block code will divide the image into vertical parts.
Like this:

2 But for divide image into 4 parts you need add code which will:
Will rotating these 2 images to 90 degrees and after that will be dividing images into vertical parts and after that rotate to 90 degrees (COUNTERCLOCKWISE) and save 2 images for the left side.
Absolutely the same for the right side.
So open the file with the name how_devide_image_without_save.py and add the next code:
##########################################
# At first Horizontal devide left1 image #
##########################################
#rotate image LEFT1 to 90 CLOCKWISE
img = cv2.rotate(left1, cv2.ROTATE_90_CLOCKWISE)
# start vertical devide image
height = img.shape[0]
width = img.shape[1]
# Cut the image in half
width_cutoff = width // 2
l1 = img[:, :width_cutoff]
l2 = img[:, width_cutoff:]
# finish vertical devide image
#rotate image to 90 COUNTERCLOCKWISE
l1 = cv2.rotate(l1, cv2.ROTATE_90_COUNTERCLOCKWISE)
#save
cv2.imwrite("one_horisont_1.jpg", l1)
#rotate image to 90 COUNTERCLOCKWISE
l2 = cv2.rotate(l2, cv2.ROTATE_90_COUNTERCLOCKWISE)
#save
cv2.imwrite("one_horisont_2.jpg", l2)##########################################
# At first Horizontal devide right1 image#
##########################################
#rotate image RIGHT1 to 90 CLOCKWISE
img = cv2.rotate(right1, cv2.ROTATE_90_CLOCKWISE)
# start vertical devide image
height = img.shape[0]
width = img.shape[1]
# Cut the image in half
width_cutoff = width // 2
r1 = img[:, :width_cutoff]
r2 = img[:, width_cutoff:]
# finish vertical devide image
#rotate image to 90 COUNTERCLOCKWISE
r1 = cv2.rotate(r1, cv2.ROTATE_90_COUNTERCLOCKWISE)
#save
cv2.imwrite("second_vhorisont_1.jpg", r1)
#rotate image to 90 COUNTERCLOCKWISE
r2 = cv2.rotate(r2, cv2.ROTATE_90_COUNTERCLOCKWISE)
#save
cv2.imwrite("second_horisont_2.jpg", r2)
3 You should see something like that.
In your directory should be saved 4 new images. Let's look at this.
Result:
In this article, we divided the image into 4 parts using OpenCV. Code for this article is available here.